How to install a font on my computer?
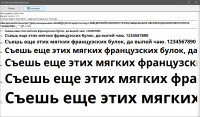
In different operating systems, there are certain font libraries that are sufficient for everyday use: writing articles, preparing training (diplomas, abstracts) and working (reports, forms, applications) documentation. But designers and publishers are more difficult. To create a unique recognizable brand or magazine, customers want more interesting non-standard fonts that are not found in standard operating system libraries. In such cases, the person must choose the type of font of interest for special services, such as fontsfree.pro. On this resource you can choose different types of fonts in the formats TTF, EOT, WOFF for your computer. And if you download the entire archive with the font, it will be fully prepared for use in your Web project, having all the font formats inside all available shapes, as well as a CSS stylesheet. On the service there are various categories of fonts: from manuscript styles of various countries (Ancient Greek, Roman) and up-to-date styles for techno and web design.
The most popular format for installing fonts is TTF. Using this article, you will understand how easy it is to install fonts on different platforms: Windows, Linux, MacOS.
How to install a font in Windows
Windows began supporting true type formats (TTF) with the release of Windows 3.1 and continue to our time. Installing fonts in different versions of Windows is almost the same. The person who had the XP font installation skills can also just repeat this in Windows Vista, 7, 8, 10.
Fonts in Windows are stored in the system folder with the path C:\WINDOWS\Fonts. To skip the process of installing the font, you can simply copy the downloaded from the disk, USB flash drive or Internet TTF file to this folder.

After this action, you can easily use the font without a direct installation.
You can install the font directly through the file. To do this, left-click on the new TTF file with fonts and click on the "install" button.

After that the following operation will occur:

How to install a font in Linux
With the installation of fonts on Linux, everything is slightly more complicated than with the operating system from Microsoft. The Linux system uses two folders: for fonts available to all PC users, the /usr/share/ fonts folder is used, and the .fonts folder is available only for the selected user account.
To add new fonts to Linux OS, you must do the following:
Действие 1. Необходимо создать в корне домашней родительской директории (меню > Домашняя папка) папку с абсолютно любым названием, которое начинается с латинской буквы.
Step 1. You need to create a folder with absolutely any name in the root of the home directory which starts with a Latin letter. (menu> Home folder).Step 2. You need to copy all the font files that you would like to install on the Linux OS to this folder.Действие 3. Необходимо запустить терминал и в нем перейти в образованный каталог при помощи команды cd ~/preps. После данного действия, чтобы увидеть все содержимое, необходимо прописать команду ls. Операционная система Linux предоставит Вам полный список помещенных файлов со шрифтами.
Step 3. You need to start the terminal and in it go to the created directory using the command cd ~/preps. After this action, to see all the contents, you need to enter the ls command. The Linux operating system will provide you with a complete list of placed font files.Действие 4. Необходимо выполнить ввод команды sudomv «название шрифта.ttf» /usr/share/fonts/truetype. В данном примере возможно перемещение файлов во вложенный каталог truetype.Для завершения процесса установки шрифта необходимо после нажатия на Enter прописать пароль администратора.
Поздравляю, Вы установили шрифт в систему и теперь можете его использовать во всех Linux программах.
Step 4. You need to enter the sudomv "font name.ttf" /usr/share/fonts/truetype . In this example, files can be moved to the truetype sub-directory. To complete the font installation process, after having pressed Enter, you will need to register an administrator password.Congratulations, you installed the font in the system and now you can use it in all Linux programs.
How to install a font in MacOS
In the operating system from Apple, the installation of fonts is very simply. In addition, the latest version of OSX supports Windows fonts without any modification.The first way to install the font in MacOS:
For the easiest way to install the font, just double-click on the file and click on the Install font button in the window that opens. After this action, the font will be available in any application.
The second way of installation is more advanced. First you need to open the Fontbook program - a kind of font manager for MacOS.
After opening the program, you must set the exact location for installing a new font. The User folder should be changed to Computer so that the font is available for all accounts of this PC. On the preview menu, choose Custom to allow you to enter any text in the preview field. Also in this field you can change the size of the text.How to install a font in Photoshop.
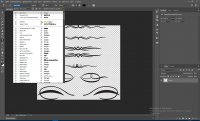
The installation of the font of Photoshop completely coincides with the installation of the font in the operating system. Download Photoshop free and use its trial to install fonts and use them for your purposes. Photoshop software is used on systems: Windows and MacOS, so first you need to install the font in your OS. The only recommended action after installing the font in the system is to compare the file name with the font name. Since the photoshop will display exactly the name of the font, not the name of the installed file.

Comments (24)